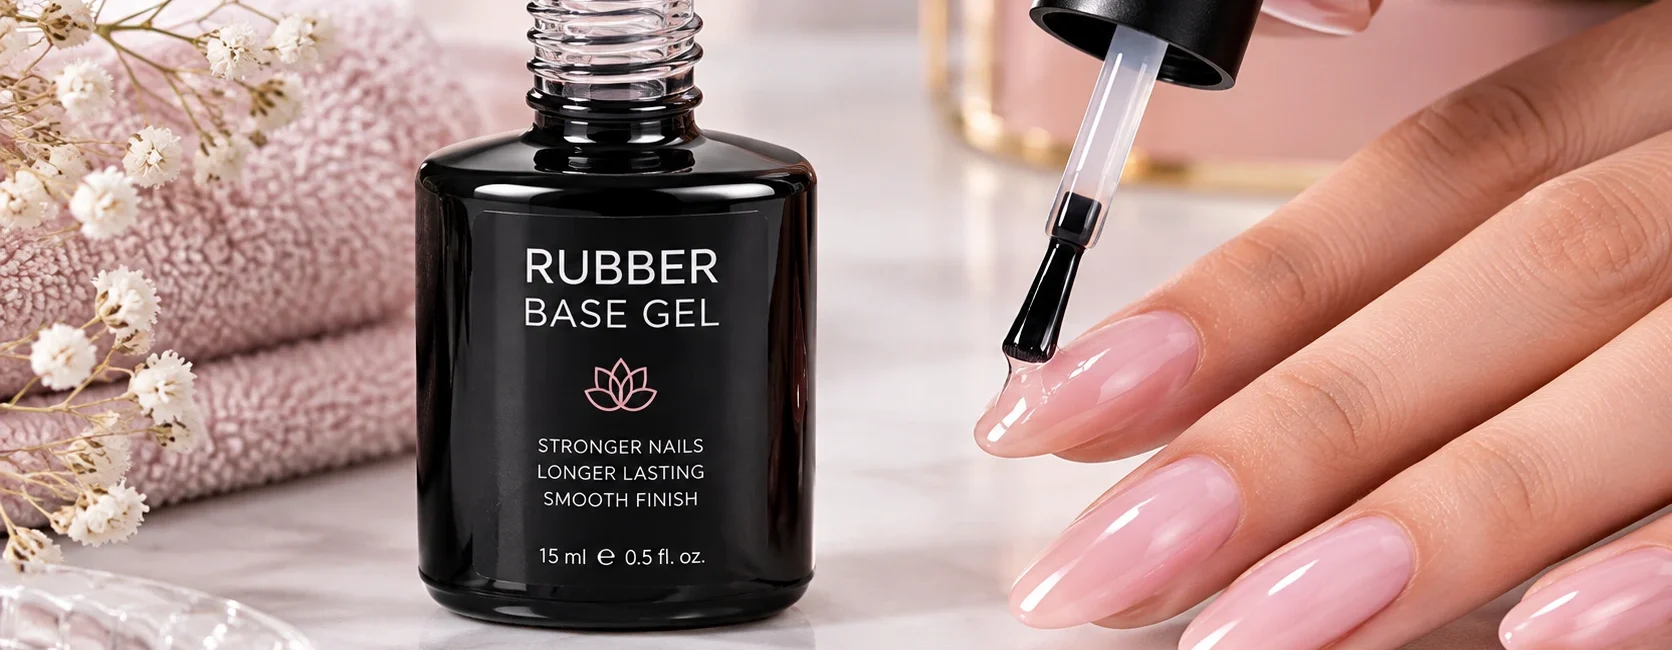
If you’ve been in a nail salon recently or spent more than ten minutes on nail TikTok, you’ve heard the term rubber base gel and probably wondered what makes it different from the regular base coat you’ve been using. The answer is more significant than most people expect. Rubber base gel is not just another base coat. It is a fundamentally different product category that solves the three most persistent problems in gel manicures lifting, chipping, and breakage through a chemistry that regular gel polish bases simply cannot replicate.
In 2026–2027, rubber base gel has moved from a professional salon secret to one of the most-discussed nail products among at-home enthusiasts, nail students, and licensed technicians alike. This guide covers everything: what it actually is, how the chemistry works, who needs it, step-by-step application, the best brands tested this year, how it compares to builder gel, common mistakes, and removal. No filler, no fluff just the complete resource.
What Is Rubber Base Gel? The Real Definition
Rubber base gel is a thick, flexible, highly adhesive gel product used as a foundation layer in gel manicures. It is composed of acrylate polymers that form a flexible network when cured under UV or LED light a network that bends and moves with the natural nail rather than rigidly against it.
The name “rubber” refers to two defining physical properties after curing:
Flexibility. Unlike traditional gel bases that cure to a hard, brittle finish, rubber base gel cures to a semi-flexible state. When you flex a cured rubber base, it bends rather than snapping mimicking the natural flex behavior of the nail itself. This single characteristic is responsible for the product’s dramatically better chip and lifting resistance compared to standard bases.
Viscosity. Rubber base gel is significantly thicker than regular gel polish base coats. This thickness serves a functional purpose: the product self-levels on the nail surface, filling in ridges, fine lines, and surface imperfections to create a flawlessly smooth canvas before color is applied.
Together, these two properties flexibility and self-leveling viscosity explain why rubber base gel has become the go-to foundation for nail techs working with weak, brittle, thin, or structurally compromised nails. It does what regular base coats cannot: it moves with the nail, absorbs the micro-shocks of daily use, and fills the surface imperfections that would otherwise become lifting points.
How Rubber Base Gel Works: The Science
Understanding the chemistry makes the product’s advantages immediately clear.
Standard gel polish base coats use thin, low-viscosity acrylate formulas designed primarily for adhesion. They cure hard and provide a bonding surface for gel color. The problem is their rigidity when the natural nail flexes (which it does constantly during normal daily use), the hard-cured base resists the flex, creating micro-stress points at the bond between gel and nail. Over time, these micro-stress points become lifting edges or chips.
Rubber base gel uses a higher-weight acrylate polymer network closer in chemistry to builder gels than to standard base coats that cures to a semi-flexible state rather than a rigid one. When the nail flexes, the cured rubber base flexes with it, distributing the stress evenly across the product rather than concentrating it at the nail-gel interface. This is the mechanical reason rubber base gels last 2–3 weeks with minimal lifting even on the most problematic nail types.
The self-leveling viscosity works through surface tension. The thick formula spreads evenly under the force of the brush stroke, then continues to level itself out over the nail surface before curing. Ridges and surface imperfections that would show through a thin base coat are filled and smoothed before they can affect the final appearance of the manicure.
Who Needs Rubber Base Gel?
Rubber base gel was originally developed for professional nail technicians working with clients whose nail conditions made standard gel manicures impractical. Its clinical applications have since expanded into the at-home market, and the product is now appropriate for:
Weak, thin, or flexible nails. The most important use case. If your nails bend easily or break frequently, rubber base gel provides a strengthening layer that adds durability without the weight or rigidity of a full acrylic or hard gel overlay.
Nails prone to lifting. If your gel manicures regularly lift at the edges or tips before two weeks, rubber base gel’s enhanced adhesion and flexibility almost always solves the problem the flex of the base accommodates nail movement that was previously causing lifting.
Ridged or uneven nail surfaces. The self-leveling property fills surface imperfections that make color application uneven. Clients with vertical ridging, peeling from the nail plate surface, or post-damage recovery benefit significantly from rubber base gel’s smoothing effect.
Post-gel or post-acrylic nail recovery. Nails recovering from previous gel or acrylic damage are thin, fragile, and prone to breakage. Rubber base gel provides protection and structure while the natural nail grows out without adding the weight of a full enhancement system.
At-home gel manicure enthusiasts. The product’s forgiveness during application the self-leveling property corrects minor brush stroke errors makes it more accessible for home users than traditional builder gels.
For context on how rubber base gel fits within the broader gel nail extension landscape and how it compares to systems like Gel-X our complete guide to Gel-X nails covers the full range of gel nail systems and how they differ from rubber base applications.
Rubber Base Gel vs. Builder Gel vs. Regular Base Coat: What’s the Difference?
This is the most-searched comparison in the rubber base gel category, and the distinctions matter significantly for choosing the right product.
| Feature | Regular Base Coat | Rubber Base Gel | Builder Gel |
|---|---|---|---|
| Consistency | Thin, watery | Thick, viscous | Thick to very thick |
| Flexibility after cure | Rigid | Semi-flexible | Rigid to semi-rigid |
| Self-leveling | No | Yes | Partial |
| Can extend nail length | No | Limited (1–2mm) | Yes |
| Fills ridges | No | Yes | Partial |
| Soak-off removal | Yes | Yes | Some require filing |
| Skill level required | Beginner | Beginner–Intermediate | Intermediate–Advanced |
| Best for | Healthy nails, basic gel | Weak, ridged, lifting-prone nails | Length extension, structure |
The clearest distinction: Rubber base gel is for protecting and improving the foundation on natural nails. Builder gel is for building length and significant structural extension. They are not interchangeable though rubber base gel can replace a regular base coat in virtually any gel manicure.
How to Apply Rubber Base Gel Step-by-Step
Step 1 — Nail Preparation
Proper prep is the single most important factor in rubber base gel performance even more so than with regular base coats, because the product’s enhanced adhesion amplifies both good and poor prep outcomes.
Push back and remove cuticle tissue fully. File the nail surface lightly with a fine-grit file (180–240 grit) to create a slightly textured surface for adhesion. Clean the nail plate thoroughly with 99% isopropyl alcohol or a dedicated nail dehydrator. Allow to dry completely before proceeding.
Optional but recommended: Apply a thin layer of pH bonder or primer to the nail plate before the rubber base. This step significantly improves adhesion, particularly for naturally oily nails or clients with persistent lifting history.
Step 2 — Apply the Slip Layer
This is the technique that separates professional rubber base application from amateur results. Rather than applying one thick layer, start with a very thin “slip layer” a minimal amount of product applied without fully loading the brush. Do not cure this layer.
The slip layer prevents the product from dragging or lifting during the main application stroke, allowing the thicker main layer to self-level properly without creating thick edges or flood zones near the cuticle.
Step 3 — Apply the Main Layer
Working over the uncured slip layer, apply a slightly more generous main layer of rubber base gel, sweeping from the cuticle to the free edge in one or two clean strokes. Cap the free edge drag the brush slightly over the tip of the nail to prevent lifting at the edges.
The self-leveling property will correct minor application inconsistencies in the seconds before curing. Do not over-work the product with repeated brush strokes, which can introduce air bubbles and disrupt the leveling process.
Step 4 — Cure
Cure under a UV or LED lamp according to the manufacturer’s instructions typically 30 to 60 seconds under a 36W–48W LED lamp. Undercuring is one of the most common causes of rubber base gel failure: always verify your lamp’s wattage is compatible with the product and that the nail is fully within the lamp’s curing zone.
Step 5 — Build if Needed
For additional thickness, nail ridge correction, or minor length extension, a second layer of rubber base gel can be applied and cured over the first. On very ridged or uneven nails, two layers significantly improve the surface quality.
Step 6 — Apply Color and Top Coat
Proceed with your chosen gel polish color over the cured rubber base, applying in thin, even coats and curing between each. Seal with a compatible gel top coat. The rubber base gel is fully compatible with most gel polish and top coat brands check manufacturer guidance for specific compatibility notes.
Best Rubber Base Gels of 2026–2027
1. Modelones Rubber Base Gel — Best Overall
Price: ~$12–$16 | Consistency: Medium | Best for: All nail types, beginners and professionals
The most consistently recommended rubber base gel across nail tech communities in 2026–2027. The Modelones formula provides exceptional flexibility and adhesion in a consistency that is thick enough to self-level effectively but workable enough for precise application. Reviewers across Amazon and beauty communities specifically praise its compatibility with most gel polish brands and its reliable 2–3 week wear time even on problem nails. Clean formula: free from HEMA, parabens, and formaldehyde.
2. Kodi Professional Rubber Base Gel — Best Professional Grade
Price: ~$15–$22 | Consistency: Thick | Best for: Nail techs, thin and brittle nails
A salon-standard formula with a durable, protective finish and strong adhesion that significantly outperforms standard base coats for clients with weak nails. The thicker consistency provides more pronounced ridge-filling and surface-leveling than lighter formulas. Widely used in professional settings and recommended by nail educators for its predictable, consistent performance across different nail types.
3. The Gel Bottle Clear Rubber Base — Best Premium Option
Price: ~$25–$35 | Consistency: Medium-thick | Best for: Professional use, sensitive nails
A combination base coat and primer in one formula the dual functionality means no separate primer application is needed, streamlining the application process. Compatible with UV and LED lamps, flexible after curing, and specifically praised for its gentle formulation suitable for sensitive or reactive nail clients. Available through professional supply channels and direct from The Gel Bottle’s US site.
4. Beetles Clear Rubber Base — Best Value
Price: ~$8–$12 | Consistency: Medium | Best for: At-home users, beginners
A nourishing formula enriched with vitamins that appeals specifically to at-home users who want rubber base gel performance without the professional price. The buildable consistency makes it more forgiving for beginners still developing their application technique, and the nail-nourishing ingredient profile makes it suitable for nails in recovery from previous damage.
5. Pink Gellac Rubber Base UV/LED — Best for Sensitive Skin
Price: ~$18–$24 | Consistency: Medium | Best for: Sensitive skin, HEMA-free requirement
Formulated specifically for clients with gel sensitivity or known HEMA allergies a growing consideration as gel nail sensitivity has increased in prevalence alongside the rise of gel manicure popularity. Provides 14–21 day wear with strong adhesion and no primer requirement, in a formula certified safe for sensitive skin and contact lens wearers.
Common Rubber Base Gel Mistakes and How to Fix Them
Lifting at the cuticle area. Almost always caused by flood zones product touching the cuticle or skin rather than sitting 0.5–1mm away. Prep also matters: ensure all cuticle tissue is fully removed before application, as any remaining tissue will cause lifting regardless of product quality.
Bubbles in the cured product. Usually caused by over-working the product with too many brush strokes. Apply the slip layer, then the main layer, and let the self-leveling property do its work without repeated brushing.
Thick, uneven edges. A result of over-applying product or applying too close to the nail edges. Work thin layers and cap the free edge cleanly rather than dragging product toward the lateral nail folds.
Product not curing fully. Under-powered lamps, incorrect positioning of the hand within the lamp, or product applied too thickly are the most common causes. Verify your lamp output (36W minimum for LED) and ensure nails are flat and fully within the curing zone.
Premature lifting on oily nails. Use a pH bonder or primer before the rubber base gel on naturally oily nail types. The dehydrating effect of the bonder removes the surface oils that prevent optimal adhesion.
How to Remove Rubber Base Gel
Rubber base gel is fully soak-off in acetone unlike some hard gels that require filing. The removal process is comparable to regular gel polish removal with a slightly longer soak time due to the product’s denser polymer network.
Method:
- Lightly file the top coat to break the seal
- Soak cotton pads in pure acetone, place directly on each nail
- Wrap in foil or use nail clips to hold in place for 15–20 minutes
- Gently push and roll the softened gel off the nail using a cuticle pusher never force or peel
- Buff any remaining residue and hydrate thoroughly with cuticle oil
The key principle: always soak off rubber base gel through acetone rather than attempting mechanical removal. Peeling or forcing the product off strips layers of the natural nail plate, causing the thinning and damage that rubber base gel was designed to protect against.
Rubber Base Gel as a Standalone Manicure
An increasingly popular use case: applying rubber base gel in a clear or tinted version directly as the finished manicure, with no gel polish color on top. This approach gives the nail a smooth, clean, natural-looking finish with the structural reinforcement of the rubber base essentially a strengthened version of a “bare” nail.
Clear rubber base gel manicures are particularly popular for professional settings where colored nails aren’t appropriate, for those in nail recovery who need protection without color, and for the “clean girl” aesthetic that has dominated beauty content since 2023. The result is polished, professional, and nail-forward in a way that matches current nail trends exactly.
Final Thoughts: Is Rubber Base Gel Worth It?
For anyone experiencing gel manicure lifting, chipping, or breakage or anyone with weak, thin, or ridged nails rubber base gel is not just worth it, it is the most targeted solution available. The science of flexible polymer chemistry directly solves the mechanical problems that cause most gel manicure failures, at a price point ($8–$35) that makes it accessible whether you’re a professional building your kit or a home enthusiast upgrading your routine.
Start with Modelones for a reliable all-rounder, invest in Kodi or The Gel Bottle if you’re working professionally, or try Beetles if you’re new to the category and want a forgiving introduction. Get the prep right dehydrate, prime, and cap the free edge and rubber base gel will consistently produce the clean, salon-quality, 2–3 week manicures it promises.